Cold Brew Tea: a step-by-step guide
Introduction
In the scorching heat of summer, a refreshing beverage is all you need to stay cool and hydrated. While iced tea is a classic choice, have you ever tried cold brew tea (also known as mizudashi tea)? Cold brewing offers a smoother and less bitter flavor compared to traditional hot steeping methods. It’s an incredibly simple yet versatile technique that allows you to enjoy a variety of tea flavors with minimal effort. In this article, we’ll guide you through the process of making cold brew tea at home, ensuring a delicious and revitalizing experience.
Step 1: Gather your supplies
To make cold brew tea, you’ll need the following supplies:
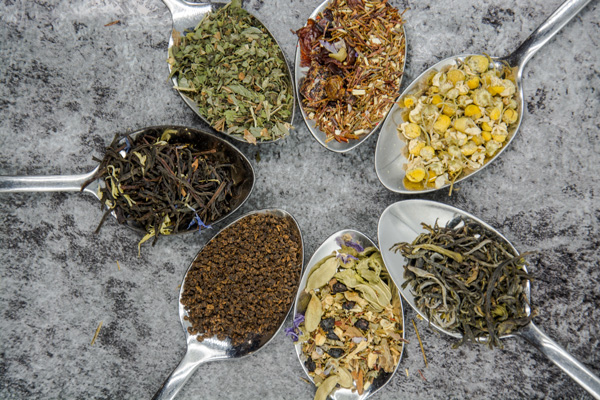
- Tea: In fact, any type of tea can be used. Black, white, green and oolong tea have already been heated during production, which means that possible bacteria or germs have already been killed and are therefore particularly suitable. The slow cold “brewing” of the tea also releases fewer catechins (tannins), resulting in a softer and less bitter end result.
With fruit tea, rooibos tea or herbal tea, the ingredients are usually only dried, which is why it is best to rinse these teas with boiling water before the cold infusion in order to kill possible germs.
- Loose leaf tea is recommended for better flavor, but tea bags work just fine.
- Cold water: Cold tap water or mineral water is sufficient.
- A pitcher or container: Look for a glass or BPA-free plastic pitcher that can hold the desired quantity of water and comfortably accommodate the tea leaves or bags. We recommend the BREWT tea maker for this.
- Optional: Additional flavorings like fruits, herbs, or sweeteners can be added based on personal preference.
Step 2: Prepare the tea
Start by deciding the tea-to-water ratio based on your taste preference and the tea variety. As a general guideline, use approximately 1.5 the amount of tea suggested. This means that when 4-5 tsp to 1 litre of water is normally recommended, it is now 6-8 tsp to 1 litre of water. Adjust this ratio according to your desired strength.
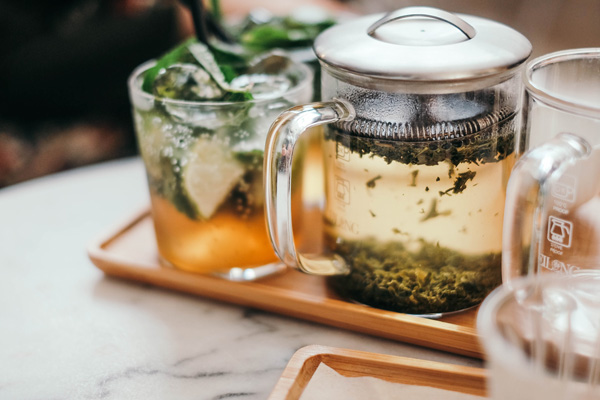
Place the tea leaves in the pitcher. You can use a separate tea infuser or strainer if you want, but the tea has only so much space to unfold in a filter. That’s why we suggest to pour the tea straight in the pitcher or desired container and filter it later once the brew is ready. Another option is to use a specific cold brew maker, that has a build in filter.
Step 3: Add water and infuse
Carefully pour cold, filtered water over the tea leaves or bags in the pitcher**. Ensure that all the tea is fully immersed in the water.
Give the mixture a gentle stir to ensure the leaves or bags are fully saturated.
**If you have chosen herbal, fruit, rooibos or PuErh* tea, it is recommended that you rinse the tea briefly with boiling water before brewing it cold. To do this, pour some freshly boiled water over the tea and pour the water directly away (or rinse the loose tea in a sieve over the sink with boiling water). This rinsing process helps to kill and wash out any germs or bacteria. Because unlike real tea (black, green, white or oolong tea), herbal, fruit and rooibos teas are only dried and not heated (*PuErh is stored for a very long time, the hot water helps to “wake it up”). Once your tea has been rinsed, you can continue with step 3 as normal.
At this point, you can add any additional flavorings like sliced citrus fruits, fresh herbs, or a touch of sweetener if desired. Be creative and experiment with different combinations! We recommend to add sweeteners towards the end, as you can then estimate how much or little you would like to sweeten. Honey or maple syrup is the best sweetener. But test first, because cold brew tea often already releases a certain mild sweetness, so extra sweetener is not always necessary.
Step 4: Steep in the refrigerator
Cover the pitcher with a lid or wrap it with plastic wrap to prevent any odors or flavors from seeping in. Place the pitcher in the refrigerator and allow the tea to steep for an extended period. Unlike hot brewing, cold brewing requires a longer infusion time to extract the flavors. The ideal steeping time is typically 8 to 12 hours, but you can adjust this based on your preference. Leaving it to steep overnight is a convenient option.
If you previously rinsed the tea with boiling water, 4 to 10 hours are sufficient (see ** in step 3).
Taste it to see if you like the result and let it steep longer if necessary. However, the infusion time should not exceed 24 hours, as it will only get bitter then.
Step 5: Strain and serve
After the desired steeping time has passed, remove the pitcher from the refrigerator. Using a fine mesh strainer or cheesecloth, strain the tea to remove the tea leaves or bags and any additional flavourings.
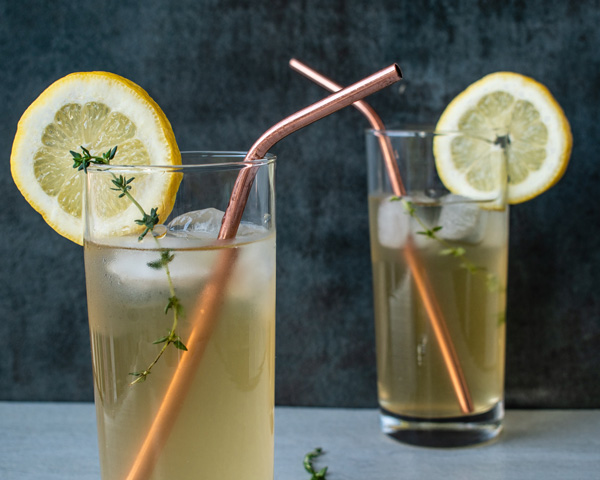
Your cold brew tea is now ready to be served! Pour it over ice cubes or enjoy it chilled straight from the refrigerator. Consider garnishing with fresh herbs, citrus slices, or a dash of honey to enhance the presentation and flavor.
Tips und Variations:
- Experiment with different tea varieties and blends to discover your favorite cold brew combinations.
- For a stronger brew, increase the steeping time, but avoid exceeding 24 hours, as the tea may become bitter.
- Adjust the tea-to-water ratio based on personal taste preferences.
- Try adding fruits like berries, peaches, or sliced cucumber for a refreshing twist.
- Cold brew tea can be stored in the refrigerator for up to three days, but it’s best to consume it within 24 hours for optimal taste.
Conclusion
Making cold brew tea is a delightful way to beat the summer heat and enjoy a flavorful and refreshing beverage. With just a few simple steps, you can create a range of delicious cold brew tea options using your favorite tea varieties. Whether you prefer black, green, white, or herbal tea, the cold brewing technique unlocks a world of smooth and refreshing flavors. So, grab your supplies, follow the steps outlined in this guide, and savor the satisfaction of your homemade cold brew tea creation. Cheers to staying cool and hydrated all summer long!